Create User Role
Administration > User Permissions > User Roles
Creating a complete user role is a 3 part process:
- Create the User Role
- Assign Functions to the Role
- Define Access Levels for the Functions.
Create a User Role when logged in as a Corporate Administrator
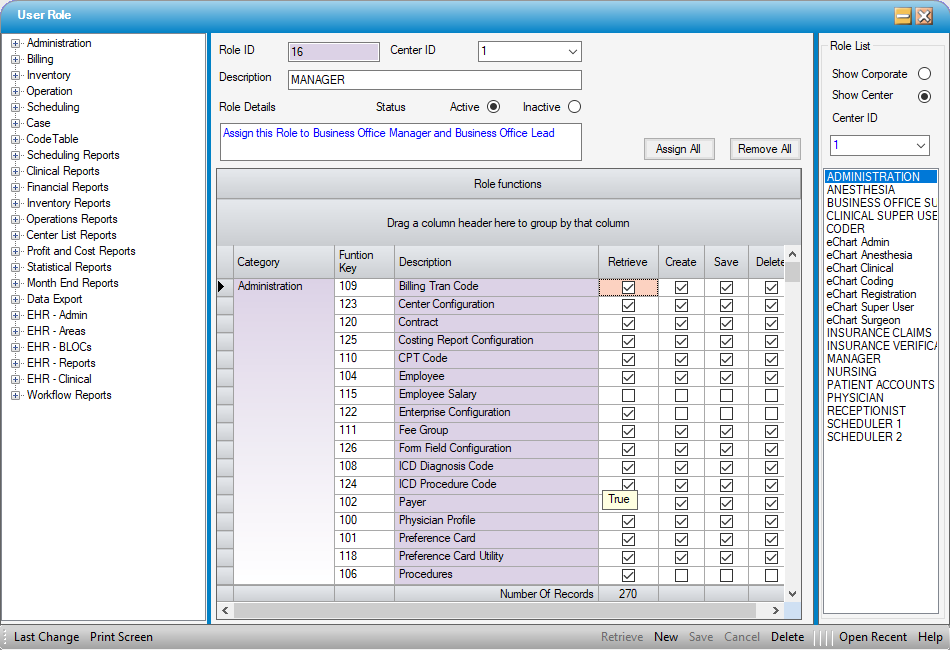
- Access the user role form
- Click
 New on the Main Form Toolbar
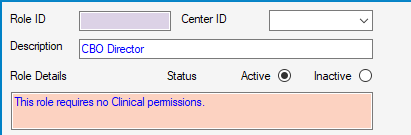
 - Enter the name of the User Role in the Description field.
- Enter any specifics regarding the User Role in the Role Details field.
Role List
- Show Corporate radio dial will display any User Roles created at the Corporate level.
- Show Center radio dial will display any User Roles created at the Center level.
- Center ID will reflect the available Centers in which the new User Role can be assigned. Select a Center from the drop down to assign the new User Role to that Center.
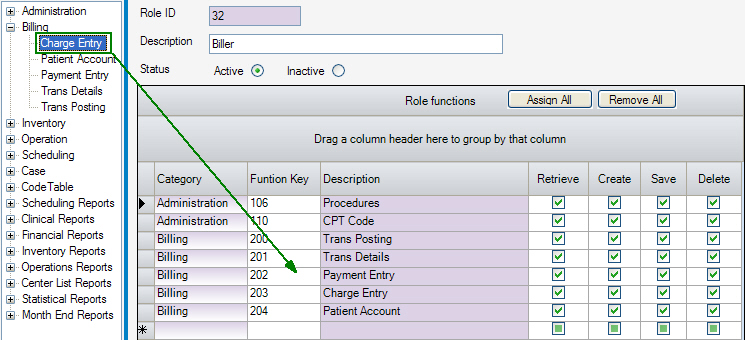
Role functions
Drag and Drop
Drag and drop either a single Function or Category.
- Highlight/select either a Category or a Function within a category.
- Hold down the left mouse key to Drag the Category or Function over to the User functions grid.
- Release the mouse button.
- Assign access levels. (When the function is assigned, the access level will default to all boxes checked. Uncheck the functions to which a User should not have access.)
Manual assignment
Manual assignment does not apply to Categories; only to Functions.
- Hover the mouse over the Function in the Tree View
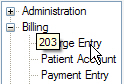
- Note the number that appears. This is the Function Key.
- Enter the number in the Function Key column of the grid.
- Assign access levels as indicated above.
Other functions
- Grant access to the entire system, by clicking the
 button.
 - Remove all functions by clicking the
 button.
 - To delete a single line, click the gray box to the left of the line to highlight the line and press the <delete> key on the keyboard. (Do not press Delete on the grey navigation bar at the bottom of the form or the entire User Profile or User Role will be deleted.)
- Click
 Save. The Role ID is assigned and the Status is "Active".
The Role ID is assigned when the new User Role is saved. Once saved, it is available for selection when creating and/or editing a User Profile.